No edit summary |
Marc Downie (talk | contribs) |
||
| (6 intermediate revisions by one other user not shown) | |||
| Line 1: | Line 1: | ||
{|cellspacing="0" cellpadding="5" border="0" align="right" class="wikitable" style="font-size:105%" |
{|cellspacing="0" cellpadding="5" border="0" align="right" class="wikitable" style="font-size:105%" |
||
| − | !width="300" colspan="2" scope="col"| |
+ | !width="300" colspan="2" scope="col"| |
| + | [[File:Ff2mlogo.png]] |
||
| + | |||
| + | 2000 FF2M Season |
||
|- |
|- |
||
|width="125" bgcolor="#ffffcc" align="center"|Previous: [[1999 FF2M Season|1999]] |
|width="125" bgcolor="#ffffcc" align="center"|Previous: [[1999 FF2M Season|1999]] |
||
| Line 7: | Line 10: | ||
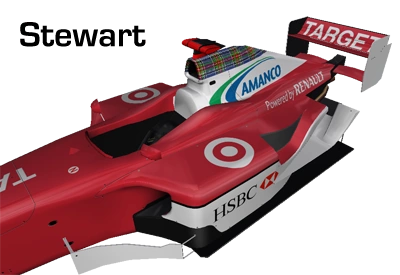
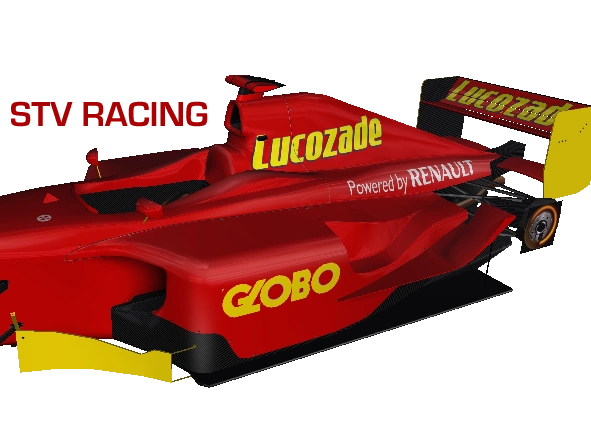
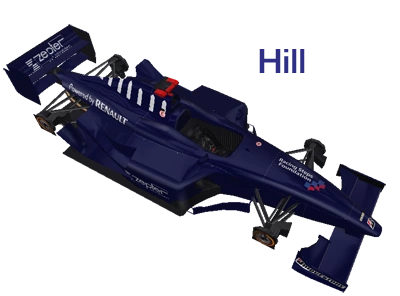
[[File:Stewart.png|thumb]][[File:Stvracing-1-.png|thumb]][[File:Cramer-1-1-.png|thumb]][[File:Hill.png|thumb]][[File:Ascari.png|thumb]][[File:Aguri-1-.png|thumb]][[File:Orangebull.png|thumb]][[File:Vtr-1-.png|thumb]][[File:Superdodgy-1-1-.png|thumb]][[File:Shamrock.png|thumb]]The '''2000 FF2M Season''' will be the 4th Season of [[FF2M]]. It will run alongside the [[2000 FF1M Season]]. |
[[File:Stewart.png|thumb]][[File:Stvracing-1-.png|thumb]][[File:Cramer-1-1-.png|thumb]][[File:Hill.png|thumb]][[File:Ascari.png|thumb]][[File:Aguri-1-.png|thumb]][[File:Orangebull.png|thumb]][[File:Vtr-1-.png|thumb]][[File:Superdodgy-1-1-.png|thumb]][[File:Shamrock.png|thumb]]The '''2000 FF2M Season''' will be the 4th Season of [[FF2M]]. It will run alongside the [[2000 FF1M Season]]. |
||
| + | == Rule Changes == |
||
| + | The 2000 FF2M Season moved to GP4 for the first time and all teams (except for OrangeBull) would use standard cars designed by Dallara. After a dispute between the teams and the organisers, the AFIA announced that they would be changing the way prize money was given out for the 2000 season. |
||
== Teams and Drivers == |
== Teams and Drivers == |
||
| Line 19: | Line 24: | ||
|rowspan="2"|[[File:22px-Flag_of_the_United_Kingdom.svg-1-.png]] Paul Stewart Racing |
|rowspan="2"|[[File:22px-Flag_of_the_United_Kingdom.svg-1-.png]] Paul Stewart Racing |
||
|rowspan="2"|Stewart |
|rowspan="2"|Stewart |
||
| − | |rowspan="2"|Renault |
+ | |rowspan="2"|[[File:Renault-logo-1-.jpg]] Renault |
|rowspan="2"|[[File:Bridgestone.jpg]] |
|rowspan="2"|[[File:Bridgestone.jpg]] |
||
! rowspan="1"|1 |
! rowspan="1"|1 |
||
| Line 29: | Line 34: | ||
|rowspan="2"|[[File:22px-Flag_of_the_United_Kingdom.svg-1-.png]] [[FJR|STV Racing]] |
|rowspan="2"|[[File:22px-Flag_of_the_United_Kingdom.svg-1-.png]] [[FJR|STV Racing]] |
||
|rowspan="2"|STV Racing |
|rowspan="2"|STV Racing |
||
| − | |rowspan="2"|Renault |
+ | |rowspan="2"|[[File:Renault-logo-1-.jpg]] Renault |
|rowspan="2"|[[File:Bridgestone.jpg]] |
|rowspan="2"|[[File:Bridgestone.jpg]] |
||
! rowspan="1"|3 |
! rowspan="1"|3 |
||
| Line 39: | Line 44: | ||
|rowspan="2"|[[File:22px-Flag_of_Brazil.svg-1-.png]] [[Gui Racing|Cramer]] |
|rowspan="2"|[[File:22px-Flag_of_Brazil.svg-1-.png]] [[Gui Racing|Cramer]] |
||
|rowspan="2"|Cramer |
|rowspan="2"|Cramer |
||
| − | |rowspan="2"|Renault |
+ | |rowspan="2"|[[File:Renault-logo-1-.jpg]] Renault |
|rowspan="2"|[[File:Bridgestone.jpg]] |
|rowspan="2"|[[File:Bridgestone.jpg]] |
||
! rowspan="1"|5 |
! rowspan="1"|5 |
||
| Line 49: | Line 54: | ||
|rowspan="2"|[[File:22px-Flag_of_the_United_Kingdom.svg-1-.png]] Graham Hill Racing |
|rowspan="2"|[[File:22px-Flag_of_the_United_Kingdom.svg-1-.png]] Graham Hill Racing |
||
|rowspan="2"|Hill |
|rowspan="2"|Hill |
||
| − | |rowspan="2"|Renault |
+ | |rowspan="2"|[[File:Renault-logo-1-.jpg]] Renault |
|rowspan="2"|[[File:Bridgestone.jpg]] |
|rowspan="2"|[[File:Bridgestone.jpg]] |
||
! rowspan="1"|7 |
! rowspan="1"|7 |
||
| Line 59: | Line 64: | ||
|rowspan="2"|[[File:22px-Flag_of_Italy.svg-1-.png]] Yellow Black Motorsport |
|rowspan="2"|[[File:22px-Flag_of_Italy.svg-1-.png]] Yellow Black Motorsport |
||
|rowspan="2"|Ascari |
|rowspan="2"|Ascari |
||
| − | |rowspan="2"|Renault |
+ | |rowspan="2"|[[File:Renault-logo-1-.jpg]] Renault |
|rowspan="2"|[[File:Bridgestone.jpg]] |
|rowspan="2"|[[File:Bridgestone.jpg]] |
||
! rowspan="1"|9 |
! rowspan="1"|9 |
||
| Line 69: | Line 74: | ||
|rowspan="2"|[[File:22px-Flag_of_Japan.svg-1-.png]] Team White |
|rowspan="2"|[[File:22px-Flag_of_Japan.svg-1-.png]] Team White |
||
|rowspan="2"|Aguri |
|rowspan="2"|Aguri |
||
| − | |rowspan="2"|Renault |
+ | |rowspan="2"|[[File:Renault-logo-1-.jpg]] Renault |
|rowspan="2"|[[File:Bridgestone.jpg]] |
|rowspan="2"|[[File:Bridgestone.jpg]] |
||
! rowspan="1"|11 |
! rowspan="1"|11 |
||
| Line 79: | Line 84: | ||
|rowspan="2"|[[File:22px-Flag_of_Brazil.svg-1-.png]] Team Green |
|rowspan="2"|[[File:22px-Flag_of_Brazil.svg-1-.png]] Team Green |
||
|rowspan="2"|Senna |
|rowspan="2"|Senna |
||
| − | |rowspan="2"|Renault |
+ | |rowspan="2"|[[File:Renault-logo-1-.jpg]] Renault |
|rowspan="2"|[[File:Bridgestone.jpg]] |
|rowspan="2"|[[File:Bridgestone.jpg]] |
||
! rowspan="1"|14 |
! rowspan="1"|14 |
||
| Line 89: | Line 94: | ||
|rowspan="2"|[[File:22px-Flag_of_the_United_Kingdom.svg-1-.png]] Dark Wolf |
|rowspan="2"|[[File:22px-Flag_of_the_United_Kingdom.svg-1-.png]] Dark Wolf |
||
|rowspan="2"|OrangeBull |
|rowspan="2"|OrangeBull |
||
| − | |rowspan="2"|Renault |
+ | |rowspan="2"|[[File:Renault-logo-1-.jpg]] Renault |
|rowspan="2"|[[File:Bridgestone.jpg]] |
|rowspan="2"|[[File:Bridgestone.jpg]] |
||
! rowspan="1"|16 |
! rowspan="1"|16 |
||
| Line 99: | Line 104: | ||
|rowspan="2"|[[File:22px-Flag_of_the_United_Kingdom.svg-1-.png]] VTR |
|rowspan="2"|[[File:22px-Flag_of_the_United_Kingdom.svg-1-.png]] VTR |
||
|rowspan="2"|VTR Dicks |
|rowspan="2"|VTR Dicks |
||
| − | |rowspan="2"|Renault |
+ | |rowspan="2"|[[File:Renault-logo-1-.jpg]] Renault |
|rowspan="2"|[[File:Bridgestone.jpg]] |
|rowspan="2"|[[File:Bridgestone.jpg]] |
||
! rowspan="1"|18 |
! rowspan="1"|18 |
||
| Line 109: | Line 114: | ||
|rowspan="2"|[[File:22px-Flag_of_the_United_Kingdom.svg-1-.png]] Dodgem |
|rowspan="2"|[[File:22px-Flag_of_the_United_Kingdom.svg-1-.png]] Dodgem |
||
|rowspan="2"|Super Dodgy |
|rowspan="2"|Super Dodgy |
||
| − | |rowspan="2"|Renault |
+ | |rowspan="2"|[[File:Renault-logo-1-.jpg]] Renault |
|rowspan="2"|[[File:Bridgestone.jpg]] |
|rowspan="2"|[[File:Bridgestone.jpg]] |
||
! rowspan="1"|20 |
! rowspan="1"|20 |
||
| Line 119: | Line 124: | ||
|rowspan="2"|[[File:22px-Flag_of_the_United_Kingdom.svg-1-.png]] Shannon |
|rowspan="2"|[[File:22px-Flag_of_the_United_Kingdom.svg-1-.png]] Shannon |
||
|rowspan="2"|Shamrock |
|rowspan="2"|Shamrock |
||
| − | |rowspan="2"|Renault |
+ | |rowspan="2"|[[File:Renault-logo-1-.jpg]] Renault |
|rowspan="2"|[[File:Bridgestone.jpg]] |
|rowspan="2"|[[File:Bridgestone.jpg]] |
||
! rowspan="1"|22 |
! rowspan="1"|22 |
||
| Line 135: | Line 140: | ||
Races will take place on the Friday's of [[FF1M]] weekends except for Standalone events which will have qualifying sessions on Saturdays and Races on Sunday's. |
Races will take place on the Friday's of [[FF1M]] weekends except for Standalone events which will have qualifying sessions on Saturdays and Races on Sunday's. |
||
| − | == |
+ | ==Results and Standings== |
| ⚫ | |||
| + | |||
| ⚫ | |||
| + | ===Races=== |
||
{|cellspacing="0" cellpadding="5" border="1" align="center" class="wikitable" style="font-size:95%" |
{|cellspacing="0" cellpadding="5" border="1" align="center" class="wikitable" style="font-size:95%" |
||
| Line 218: | Line 227: | ||
|} |
|} |
||
| + | ===Championship Standings=== |
||
| + | [[File:S0f2r12champs-1-.png]] |
||
| ⚫ | |||
| + | [[Category:FF2M Seasons]] |
||
| ⚫ | |||
Revision as of 12:47, 20 July 2010
|
2000 FF2M Season | |
|---|---|
| Previous: 1999 | Next: 2001 |


The 2000 FF2M Season will be the 4th Season of FF2M. It will run alongside the 2000 FF1M Season.
Rule Changes
The 2000 FF2M Season moved to GP4 for the first time and all teams (except for OrangeBull) would use standard cars designed by Dallara. After a dispute between the teams and the organisers, the AFIA announced that they would be changing the way prize money was given out for the 2000 season.
Teams and Drivers
| Team | Entrant | Engine | Tyre | No. | Race Drivers |
|---|---|---|---|---|---|
| Stewart | 1 | ||||
| 2 | |||||
| STV Racing | 3 | ||||
| 4 | |||||
| Cramer | 5 | ||||
| 6 | |||||
| Hill | 7 | ||||
| 8 | |||||
| Ascari | 9 | ||||
| 10 | |||||
| Aguri | 11 | ||||
| 12 | |||||
| Senna | 14 | ||||
| 15 | |||||
| OrangeBull | 16 | ||||
| 17 | |||||
| VTR Dicks | 18 | ||||
| 19 | |||||
| Super Dodgy | 20 | ||||
| 21 | |||||
| Shamrock | 22 | ||||
| 23 |
Team Changes
All team entries are currently provisional and will be until after entry is confirmed during the FF1M Pre Season Testing Period however all AFIA managed teams will be renamed in the honour of an ex Formula One driver for next season.
Race Schedule
Races will take place on the Friday's of FF1M weekends except for Standalone events which will have qualifying sessions on Saturdays and Races on Sunday's.
Results and Standings
Testing
The seasons shakedown test took place at Monza during the final week of pre-season. For the second year in a row Cristiano Da Matta was fastest driving for STV Racing for the first time. Justin Wilson was 2nd ahead of Marc Gene (VTR Dicks), Dario Franchitti (Cramer) and Jos Verstappen (OrangeBull).
Races
| Round | Supporting Grand Prix | Circuit | City / Location | |
|---|---|---|---|---|
| Notes | ||||
| 1 | Standalone Event | Autodromo do Estoril | Estoril | |
| 2 | Autodromo Enzo e Dino Ferrari | Imola | ||
| 3 | Silverstone Circuit | Silverstone | ||
| 4 | Circuit de Catalunya | Barcelona | ||
| 5 | Nurburgring | Nurburg | ||
| 6 | Circuit de Monaco | Monte Carlo | ||
| 7 | Brands Hatch GP | Brands Hatch | ||
| 8 | A1 Ring | Spielberg | ||
| 9 | Hockenheimring | Hockenheim | ||
| 10 | Hungaroring | Budapest | ||
| 11 | Circuit de Spa-Francorchamps | Spa | ||
| 12 | Autodromo Nazionale Monza | Monza |
Championship Standings
